-
-
products
-
resources
-
support
-
company
-
Fixing Problems with the Windows Search Indexer
By Steve Horton October 25, 2013microsoft, windows, windows search indexer1 CommentThe Microsoft Windows Search Indexer indexes more than 300 common file types. The Indexer allows users to locate documents and files quickly and easily by performing an initial scan of the user’s entire PC. Every time new files or documents are saved to the PC, the index is updated for continuous file retrieval. Keeping the Microsoft Windows Search Index up-to-date is crucial in order to allow users to retrieve information on their PC quickly.
Sometimes, the Search Indexer may be accidentally deleted or users may try to load the Indexer and receive an error message reading “Microsoft Windows Search Indexer stopped working and was closed.” When users encounter this problem, there are a number of steps they can take to fix the issue.
Troubleshooting the Microsoft Windows Search Indexer
If you try opening the Microsoft Windows Search Indexer and begin having problems locating specific files, or just opening up the indexer altogether, you can first try fixing the problem by using the Search and Indexing troubleshooter. The troubleshooter runs a scan to make sure that the Windows Search service is running properly.
Troubleshooting for Microsoft Windows Vista, Windows 7 and Windows 8
First Step: Click Start (Windows Key + X in Windows 8) and Control Panel. Click Indexing Options. Wait for the Indexing Options window to load.
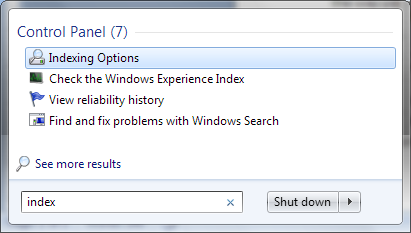
Indexing OptionsSecond Step: Once the Indexing Options box opens, click Troubleshoot Search and Indexing, located at the bottom of the window.
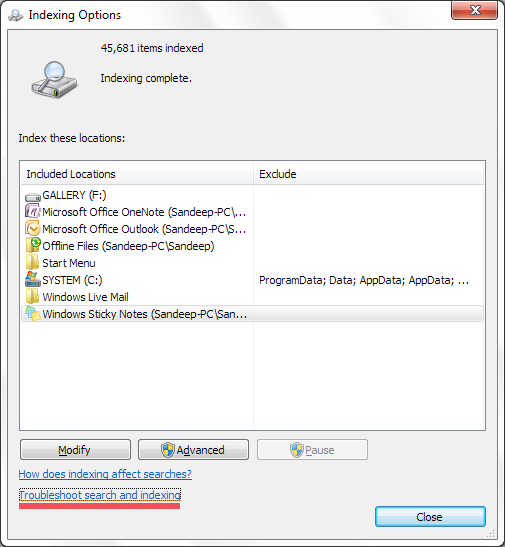
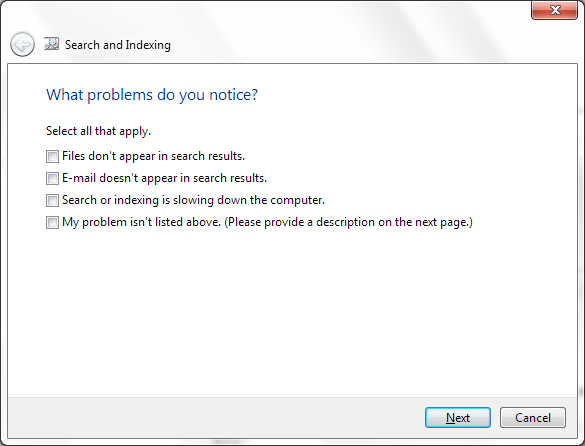
Troubleshoot Search and IndexingThird Step: Looking at the Search and Indexing dialog, locate the issues you are experiencing and select them from the list, if you don’t see your issue, click My problem isn’t listed above. Then click Next. Microsoft Windows will now use the information you provided to try to resolve your issue.
Search Indexing ProblemsRebuilding the Windows 7 Search Indexer
If the previous method doesn’t work, you may need to rebuild the entire Windows Search Indexer. Here is how you can do that:
First Step: Click Start (Windows Key + X in Windows 8) and Control Panel. Click Indexing Options. Wait for the Indexing Options window to load.
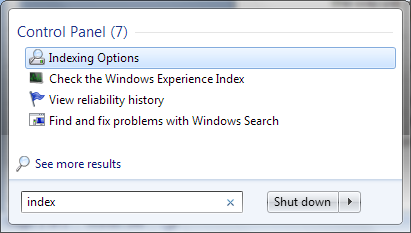
Indexing OptionsSecond Step: Click Advanced from the bottom menu of the window, then enter your admin password to give permissions to rebuild the index. This will take you to the Advanced Indexer.
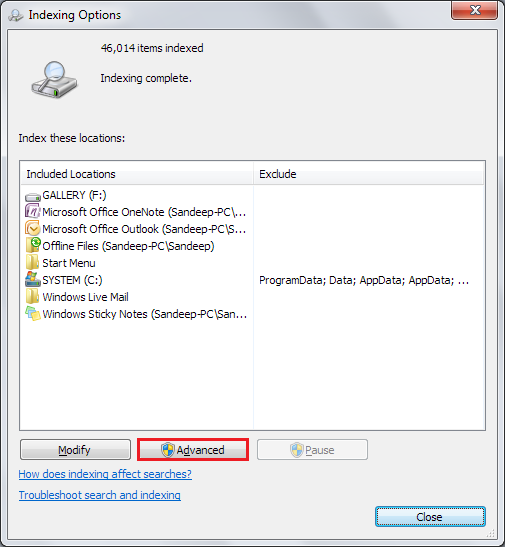
Advanced IndexerThird Step: Once you are in the Advanced Indexing Options window, click the Index Settings tab, and then choose to Rebuild the Index. This will rebuild your entire Windows Search Index.
Other Tips for Maintaining a Healthy Microsoft Windows Search Indexer
To avoid issues with your search indexer, always make sure that you have the most up-to-date troubleshooters from the Windows Online Troubleshooting Service. Keeping up to date in Windows Update will usually do the trick.
If you are experiencing problems with your search indexer, always try the Indexing Troubleshooter first! Issues such as extremely slow file searches, incorrect index searches or incomplete search results can often be quickly resolved by running the Search and Indexing troubleshooter.
Was this post helpful?YesNoFree Driver Updates
Update your drivers in less than 2 minutes to enjoy better PC performance - Free.
Free Driver Updates
Update your drivers in less than 2 minutes to enjoy better
PC performance - Free.
Didn't find your answer?Ask a question to our community of experts from around the world and receive an answer in no time at all.most relevant recent articles Pin It on Pinterest